Pages

Saturday, December 8, 2012

Cranberry Nut Bread


I've been wanting to make my Mom's cranberry nut bread for awhile now and I finally decided to make it tonight! I'm so excited about sharing this recipe that I am actually writing and posting about it on the SAME DAY that I made it!! I know, its insane.  

I've been off the grid for a long time, I'm sorry!  Life gets really crazy this time of year for us because of the holidays and because our anniversary is the week before Christmas.  Plus, I'm still trying to figure out how to get everything done that I want to do (DIY projects, blogging, starting my own business, etc.), while working full time, being a wife, maintaining our house, cooking dinners, keeping in touch with my friends, helping with Mr. Modern's photography business, AND not going completely mental at the same time... seesh!  it stresses me out just writing that!!  I definitely don't have it all figured out, but I'm working on it!  More thoughts on that another day though!


Ok, let's talk Cranberries! They remind me not only of Thanksgiving, but also stringing them as garland for decorating at Christmas time... so making cranberry bread is perfect for this month!  For as long as I can remember, my Mom has made this bread and I always loved it.  In fact, the recipe I have is dated "1994" :)

So, from my family's kitchen to yours, here is our recipe for... 

Cranberry Nut Bread

Ingredients:
2 cups of flour
1 cup of sugar
1 1/2 tsp. baking powder
1 tsp. salt
1/2 tsp. baking soda
1/4 cup butter at room temperature
1 tsp. grated orange peel
3/4 cup orange juice (fresh if you can)
1 well beaten egg
2 cups fresh cranberries
1/2 cup chopped nuts (I usually use walnuts)


Directions:

Put all of the dry ingredients into a bowl... 


 ...and mix them with a whisk or a fork. 


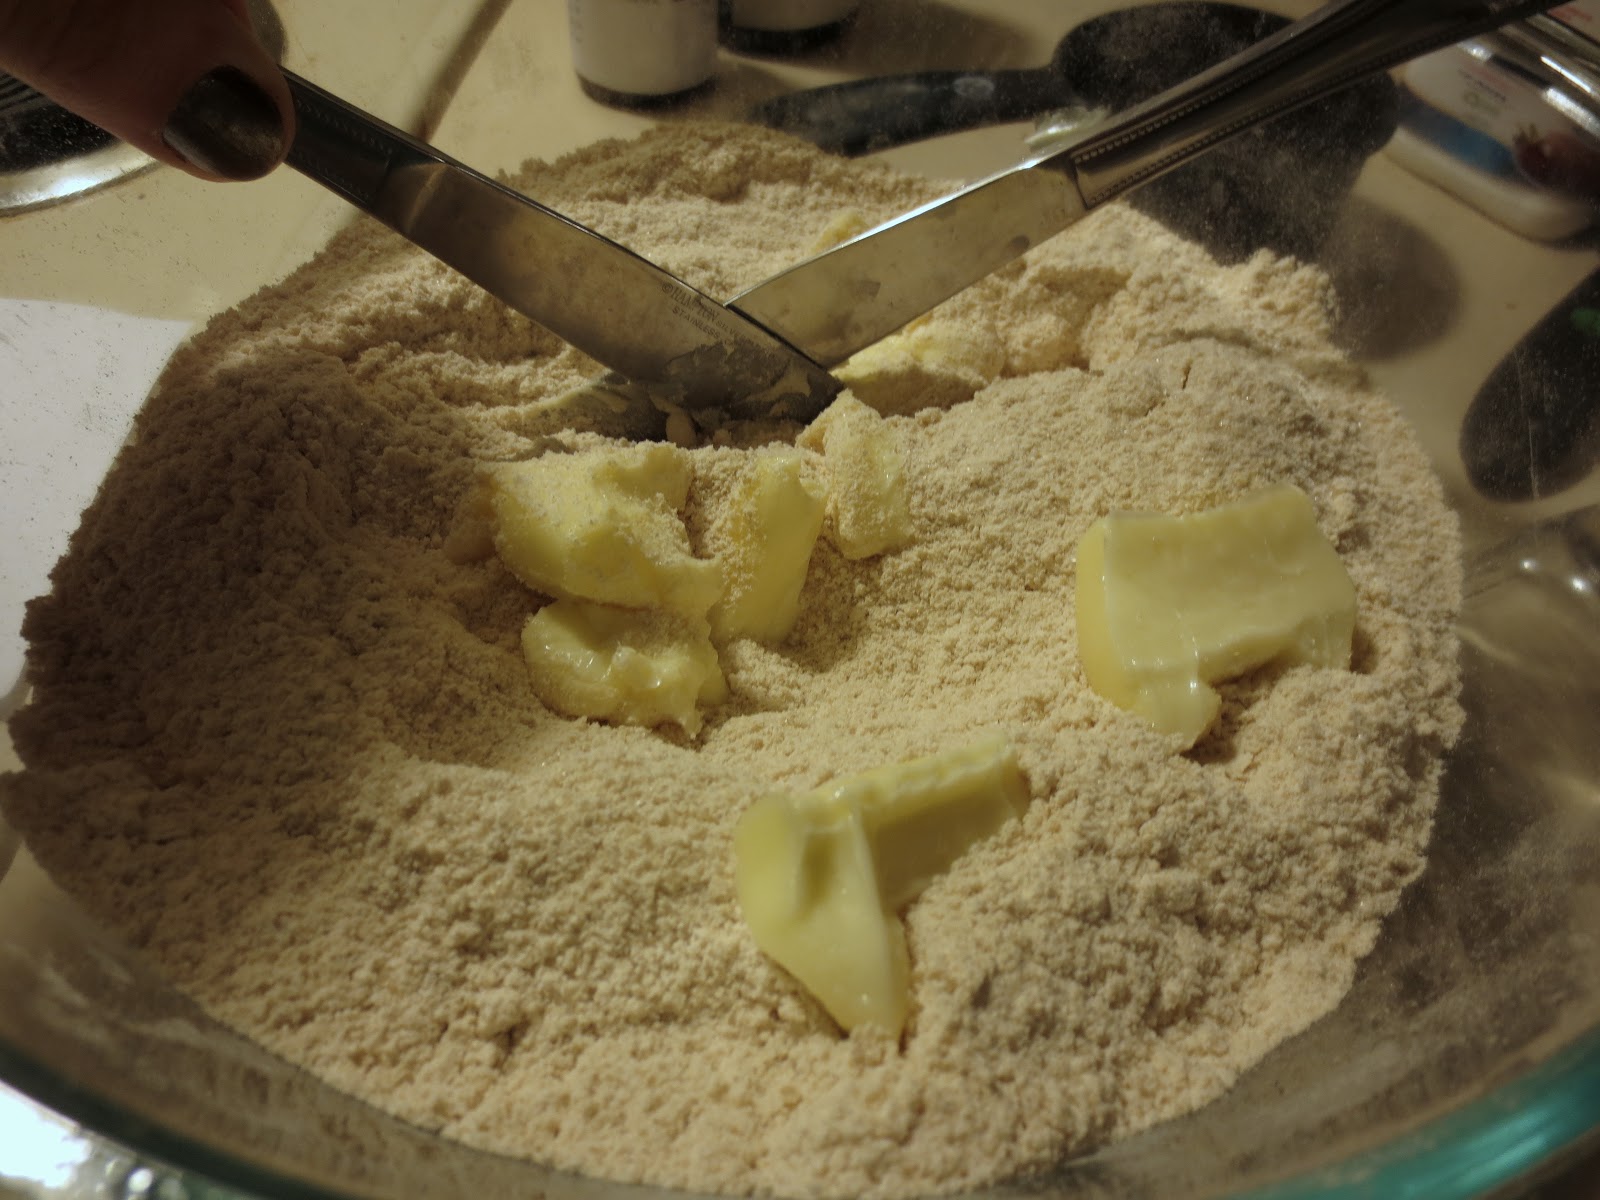
Cut the butter into the dry mixture.  

In case you have no idea what I'm talking about, all this means is that you use two butter knives in a criss cross cutting motion to mix the butter into the flour.  You will not get the same consistency if you melt the butter.  I'm sure that you could try using a stand mixer with a whisk attachment if you wanted to instead.  You'll know that its mixed enough when you can't see any big chunks of butter... (I forgot to take a picture of it after it was mixed, sorry!)


Next you want to prep the wet ingredients (orange juice/zest and egg). First, zest your oranges until you have 1 tsp of zest.  Its hard to pack it in there to get an exact measurement so if its overflowing a little it's fine.


Next, cut the oranges in half and juice them (2-3 should be enough, but I wanted to have some extra juice for later so I cut up more).  I happened to have a few different kinds of oranges so that's why they all look different (and no, the red ones are not grapefruit, they are ruby navel oranges)! 


I have the citrus juicer attachment for my Kitchen Aid so I used that for juicing the oranges... much easier than doing it by hand, I highly recommend it!


 It literally leaves nothing left worth using, its amazing!


After you have 3/4 cup of juice, beat your egg really well and add the orange juice and zest.


Pour it into the dry ingredients... 


...and mix until it is just combined.  Don't worry if there is a little flour left on the bottom, that will get mixed in when the cranberries are added.


 Make sure that you rinse the cranberries and pull out any stems or bad cranberries.


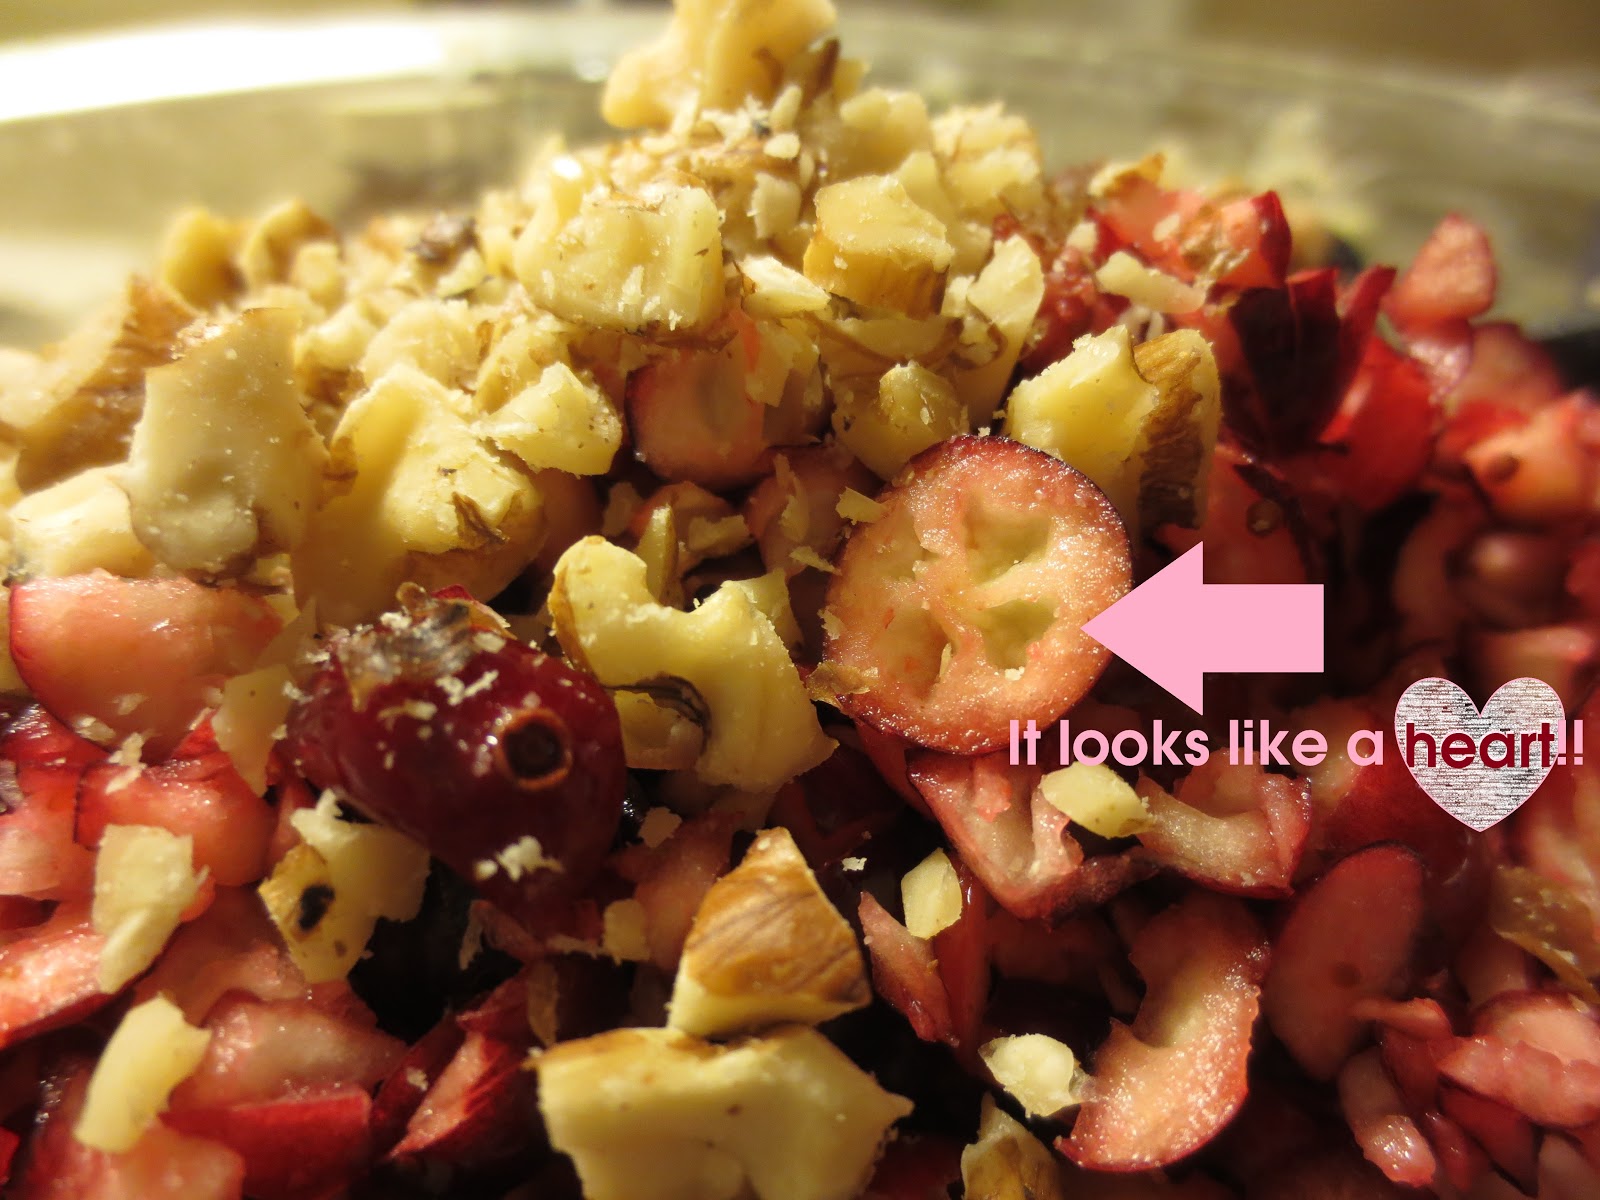
Measure out 2 cups of whole cranberries, put into a blender, and pulse until they are chopped (no more than 10 seconds).  If you don't have a blender, you can try using a knife, but I haven't tried that so no guarantees that it will work the same!
***Note: I FORGOT to measure the cranberries and ended up using the whole bag!! haha I think I ended up with a total of 3 cups... oops!


Fold in the cranberries and chopped nuts.


Add the combined mixture into a greased loaf pan and bake for 1 hour.


Because I accidentally added extra cranberries and only baked it for 1 hour, I ended up under-cooking mine a little bit.  It's still really good but the middle pieces are definitely not done.  Here is my advise for making sure it is cooked all the way: usually when you bake breads, the top of it will crack down the middle, insert the toothpick into that crack.  If it comes out clean from the crack, then it's done.  If you find that the edges are getting too dark, cover just the edges in tinfoil.

Here is the finished Cranberry Nut Bread!!


If you get a chance to try this recipe, please let me know what you think!

Happy Baking!
Mrs. Modern

Friday, November 2, 2012

I Love Lamp!!

I have been dying to do this DIY lamp project for SO long!  I've seen it several times on Pinterest and I finally decided to make one for myself!

Here is what you will need:


  • A pendant lamp shade/lantern like this one from Ikea
  • A lamp cord set like this one, also from Ikea (not pictured above)
  • Basket-style paper coffee filters (I used around 400 of the 8"or 8-12 cup size)
  • A hot glue gun w/glue
  • A good movie or two ;-)
Altogether this project cost me under $15!

I did some research beforehand to figure out if there were different types and techniques to making this amazing lamp... and it turns out there are.

Below are two of the most popular ways I've seen the filters used.

Method #1) Folding the coffee filters into triangles


Method #1 will turn out looking like this:


Method #2) Putting your finger in the center of the filter and making it into a cone, then smushing the bottom so it becomes flat. (yes, I said smushing! lol)


Method #2 will turn out looking like this:


I decided that I liked the finished look of method #2, plus I figured that it would mean I wouldn't need as many coffee filters... little did I know I would end up using 400! 

Here is how I made my lamp:

I found it easier to separate all of the coffee filters, prep/smush as many as possible ahead of time, put a bunch of glue on the lamp and then stick on a few filters before the glue dried.


I started at the top and did a single layer around the opening:


I also found it easier to work on the lamp by gently putting it between my couch and coffee table.  This was helpful because otherwise the lamp would roll over since it was top-heavy.


I didn't take a lot of pictures as I was going because it would have all looked the same.  And because I really just wanted to finish it and hang it up!

The one thing I wish I would have known from the beginning is that you don't need to glue them super close together - trust me, you can always add more later.  

I started out by putting them really close together and I wasn't even halfway done and I had already used almost 200 filters!  From there I decided to space them out a little more, which ended up working out because a little more light comes through the bottom where it counts (the dining room table).

Also, I didn't keep going in a circular pattern once the top was done because I really liked the uneven look.  I think it makes it look more unique versus gluing them to be all the same height.  

Here I am, 4.5 hours later and almost done!  I watched a lot of TV that night! haha!


I'm not kidding you, it took me 5 hours to make this.  I only bought a package of 200 coffee filters and ended up having Mr. Modern go out to buy me another one!


Here it is!!! FINALLY DONE!!!


We decided it would look the best hanging over our dining room table:


I'm so proud of it and it adds so much character to our space, especially since it can be seen from the living room, dining room, and kitchen. 

Random side note: It also turns out that Mr. Modern is an excellent painter! (I've been married to him for almost 3 years and never knew!)  Below is his first painting that he did on the same night that I made my lamp. :)


***Fair Warning! I don't know if it is because I have a cheaper glue gun, or if I just spent waaay too much time using it in one night, but my finger was black and blue and a little puffy for a couple days after I finished this project! LOL

See how much bigger my right finger is?? haha


In the end, it was DEFINITELY worth it!  Every time someone has come over to our house recently, they ask where we got our lamp and are shocked when I tell them that I made it! :)

I hope that you this post inspires you to make one of your own!  I promise, you won't regret it!

Mrs. Modern


P.S. If you liked this post, please share it with your friends and if you decide you want to add this DIY to your Pinterest please use the picture below :)


Tuesday, September 18, 2012

Tip Tuesday: Drawer Organization

I absolutely love organization.  To tell you the truth, I would rather stay home on a day off and clean my house then go out! haha!  I definitely get this "love of order" from my Dad... when we were kids, he would have us organize our rooms and toy closet at least every 3-4 months (and I mean take everything out and get rid of stuff we haven't used since the last cleaning, stuff like that).  I hated it back then, but now I just LOVE when things are neat, clean, and put away.  

I promise you that my house (or my life) does not always look like I want it to...  but I definitely try to have a place for everything so that its easier to put things away.

My tip for today is how I organize my dresser drawers, specifically, my top drawer.  It has been a life-long struggle to keep everything organized in that hot mess of a top drawer! Nothing stays where it should, socks get lost, I can't find anything quickly... you get the idea.  Also, to make matters more annoying, my top drawer happens to be a lot smaller height-wise then most other drawers, which is difficult for organizing lots of things.  In the past with my old dresser I used whole shoe boxes, but that would definitely not work in this situation.

I stumbled upon my solution on accident.  I was in a store (Ocean State Job Lot), just walking around aimlessly, and I found a pack of plastic utensil holder/drawer organizer things that you can link together to be in whatever shape/order you want them in! I was so excited, I bought two!

Here is what they look like after I installed them in my drawer!  (and no, I do not keep towels in my top drawer, I just don't want my underwear to be on display to the world!! haha!)


As you can see, they came in different sizes and shapes, but the best part is that they can be taken apart to fit any space you have.

(and yes, these pictures were taken before I made my DIY Earring Holder)

While we're here looking at my drawers, I'll let you in on my organizational madness.  I have the rest of my drawers organized by type (short sleeve, 1/2 sleeve, tanks, long sleeve, pants/shorts, PJ's, etc.) and then I have my shirts organized by color.  Honestly, it may sound like overkill, but it really helps when I want to find a specific shirt or color.


If you can't find a set of drawer organizers, you can take this idea from Real Simple (one of my favorite magazines/websites) and cut shoe boxes in half, along the length or width, to create dividers. 

I hope that this gives you some inspiration to organize your own drawers!
Mrs. Modern