Pages

Friday, November 2, 2012

I Love Lamp!!

I have been dying to do this DIY lamp project for SO long!  I've seen it several times on Pinterest and I finally decided to make one for myself!

Here is what you will need:


  • A pendant lamp shade/lantern like this one from Ikea
  • A lamp cord set like this one, also from Ikea (not pictured above)
  • Basket-style paper coffee filters (I used around 400 of the 8"or 8-12 cup size)
  • A hot glue gun w/glue
  • A good movie or two ;-)
Altogether this project cost me under $15!

I did some research beforehand to figure out if there were different types and techniques to making this amazing lamp... and it turns out there are.

Below are two of the most popular ways I've seen the filters used.

Method #1) Folding the coffee filters into triangles


Method #1 will turn out looking like this:


Method #2) Putting your finger in the center of the filter and making it into a cone, then smushing the bottom so it becomes flat. (yes, I said smushing! lol)


Method #2 will turn out looking like this:


I decided that I liked the finished look of method #2, plus I figured that it would mean I wouldn't need as many coffee filters... little did I know I would end up using 400! 

Here is how I made my lamp:

I found it easier to separate all of the coffee filters, prep/smush as many as possible ahead of time, put a bunch of glue on the lamp and then stick on a few filters before the glue dried.


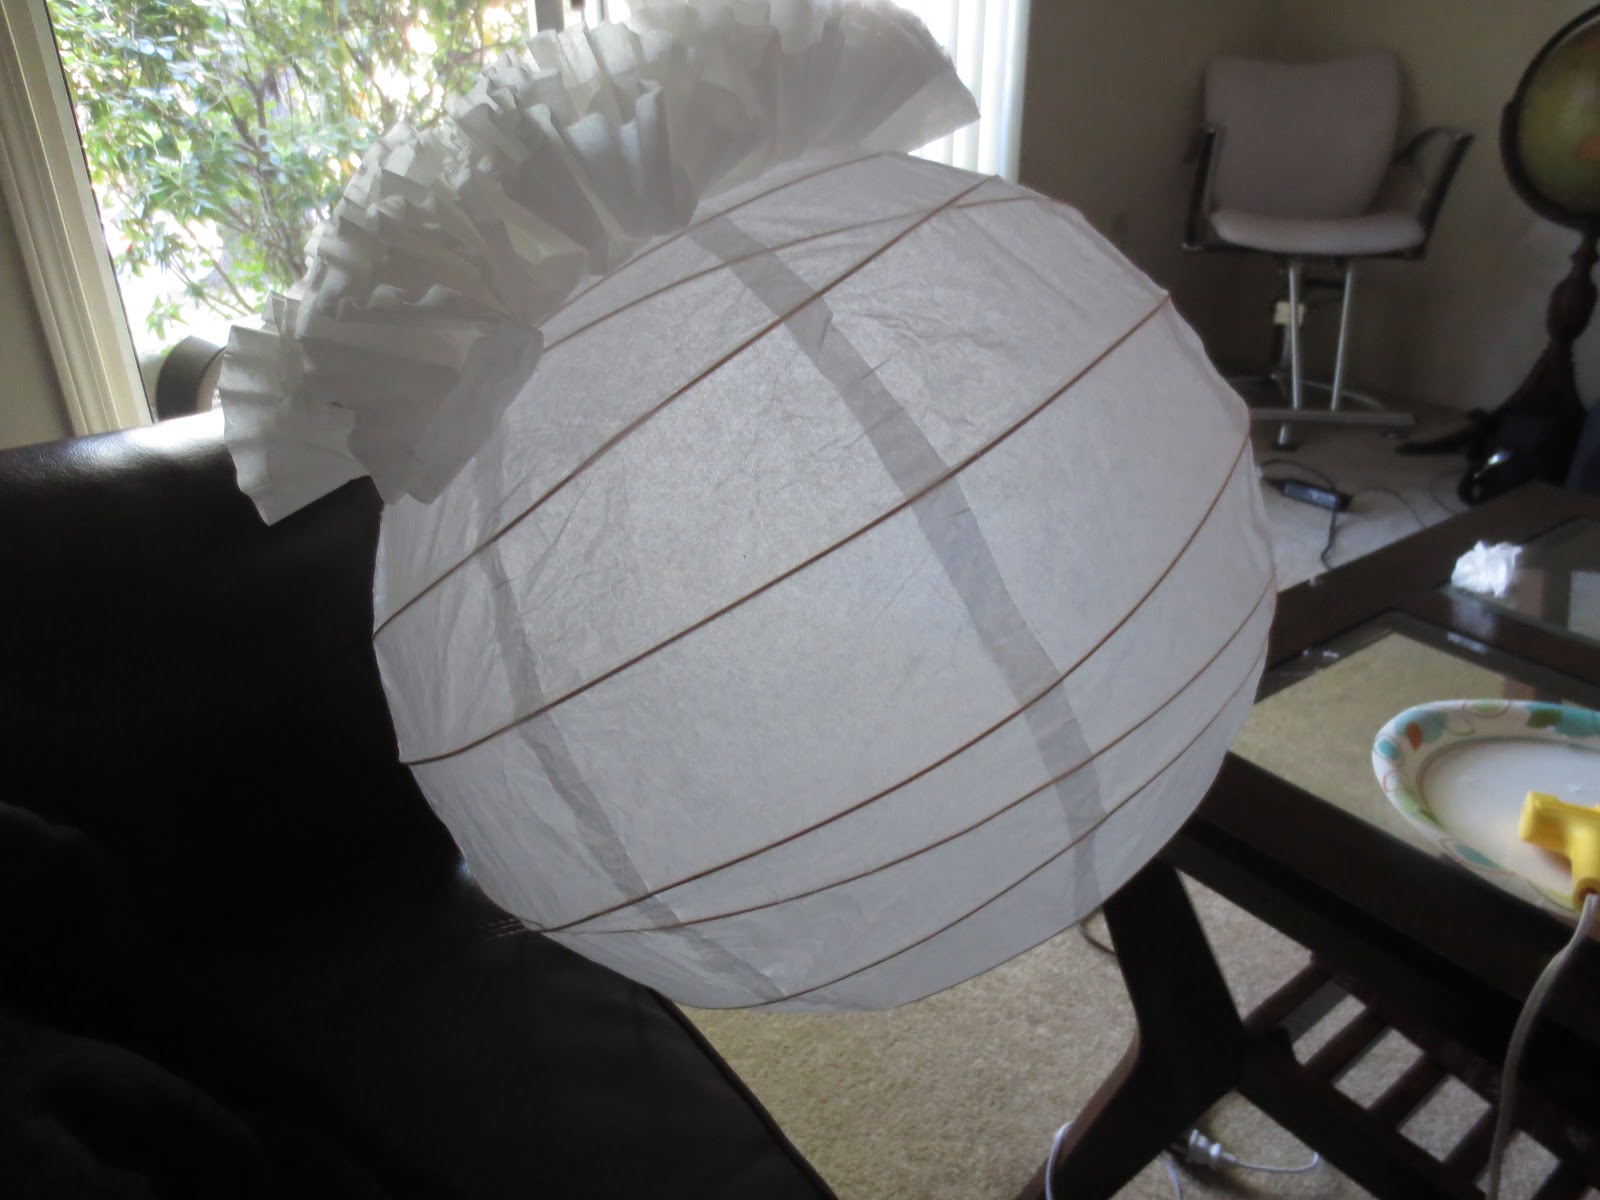
I started at the top and did a single layer around the opening:


I also found it easier to work on the lamp by gently putting it between my couch and coffee table.  This was helpful because otherwise the lamp would roll over since it was top-heavy.


I didn't take a lot of pictures as I was going because it would have all looked the same.  And because I really just wanted to finish it and hang it up!

The one thing I wish I would have known from the beginning is that you don't need to glue them super close together - trust me, you can always add more later.  

I started out by putting them really close together and I wasn't even halfway done and I had already used almost 200 filters!  From there I decided to space them out a little more, which ended up working out because a little more light comes through the bottom where it counts (the dining room table).

Also, I didn't keep going in a circular pattern once the top was done because I really liked the uneven look.  I think it makes it look more unique versus gluing them to be all the same height.  

Here I am, 4.5 hours later and almost done!  I watched a lot of TV that night! haha!


I'm not kidding you, it took me 5 hours to make this.  I only bought a package of 200 coffee filters and ended up having Mr. Modern go out to buy me another one!


Here it is!!! FINALLY DONE!!!


We decided it would look the best hanging over our dining room table:


I'm so proud of it and it adds so much character to our space, especially since it can be seen from the living room, dining room, and kitchen. 

Random side note: It also turns out that Mr. Modern is an excellent painter! (I've been married to him for almost 3 years and never knew!)  Below is his first painting that he did on the same night that I made my lamp. :)


***Fair Warning! I don't know if it is because I have a cheaper glue gun, or if I just spent waaay too much time using it in one night, but my finger was black and blue and a little puffy for a couple days after I finished this project! LOL

See how much bigger my right finger is?? haha


In the end, it was DEFINITELY worth it!  Every time someone has come over to our house recently, they ask where we got our lamp and are shocked when I tell them that I made it! :)

I hope that you this post inspires you to make one of your own!  I promise, you won't regret it!

Mrs. Modern


P.S. If you liked this post, please share it with your friends and if you decide you want to add this DIY to your Pinterest please use the picture below :)


Tuesday, September 18, 2012

Tip Tuesday: Drawer Organization

I absolutely love organization.  To tell you the truth, I would rather stay home on a day off and clean my house then go out! haha!  I definitely get this "love of order" from my Dad... when we were kids, he would have us organize our rooms and toy closet at least every 3-4 months (and I mean take everything out and get rid of stuff we haven't used since the last cleaning, stuff like that).  I hated it back then, but now I just LOVE when things are neat, clean, and put away.  

I promise you that my house (or my life) does not always look like I want it to...  but I definitely try to have a place for everything so that its easier to put things away.

My tip for today is how I organize my dresser drawers, specifically, my top drawer.  It has been a life-long struggle to keep everything organized in that hot mess of a top drawer! Nothing stays where it should, socks get lost, I can't find anything quickly... you get the idea.  Also, to make matters more annoying, my top drawer happens to be a lot smaller height-wise then most other drawers, which is difficult for organizing lots of things.  In the past with my old dresser I used whole shoe boxes, but that would definitely not work in this situation.

I stumbled upon my solution on accident.  I was in a store (Ocean State Job Lot), just walking around aimlessly, and I found a pack of plastic utensil holder/drawer organizer things that you can link together to be in whatever shape/order you want them in! I was so excited, I bought two!

Here is what they look like after I installed them in my drawer!  (and no, I do not keep towels in my top drawer, I just don't want my underwear to be on display to the world!! haha!)


As you can see, they came in different sizes and shapes, but the best part is that they can be taken apart to fit any space you have.

(and yes, these pictures were taken before I made my DIY Earring Holder)

While we're here looking at my drawers, I'll let you in on my organizational madness.  I have the rest of my drawers organized by type (short sleeve, 1/2 sleeve, tanks, long sleeve, pants/shorts, PJ's, etc.) and then I have my shirts organized by color.  Honestly, it may sound like overkill, but it really helps when I want to find a specific shirt or color.


If you can't find a set of drawer organizers, you can take this idea from Real Simple (one of my favorite magazines/websites) and cut shoe boxes in half, along the length or width, to create dividers. 

I hope that this gives you some inspiration to organize your own drawers!
Mrs. Modern

Tuesday, September 11, 2012

Tip Tuesday: Braided Belt Trick

I have a favorite black belt and I love it because its so versatile: it can be worn on the hips or on the waist, the width is perfect and it goes with almost everything... BUT, I had to figure out how to keep the end tucked in so I could wear it without belt loops... and I wanted to figure out a way to do it that didn't look stupid!

So if you have a braided belt that you would love to wear but don't know how to keep the end  from hanging, here is my tip!

It's as simple as a bobby pin........ yes, you read that right, a bobby pin!! :)

(check out my DIY Earring Holder post to see how I made what's on the wall behind me!)

Here's how it's done:

Take the extra piece that is hanging and put it where you want it (mine goes alll the way around to the middle of my back). 


Start from the back/underside of the belt and feed the top of the bobby pin through the first layer of the belt (you can twist the belt around so its in the front to make it easier to see).


Feed it through the extra hanging piece...


...and then up about a 1/4 inch and then back through so that the end doesn't show.


 TA DAA!!!


This green shirt looks really awesome with my mustard yellow purse that I'm in love with!  (This outfit can also transition into fall with a pair of black boots and a black cardigan)


I usually like to wear this shirt with long silver earrings because of how open the neckline is, and my silver bow ring (I LOVE bow rings!!!)


 Having cute bright-colored nail polish is always good too! =)


I hope that this tip will help you if you have a braided belt that you don't know what to do with! 

Mrs. Modern

Tuesday, September 4, 2012

Tip Tuesday: Cutting Peppers

I know that cutting peppers may be something that you just do without thinking about it, but one day I realized that I was wasting WAY too much with the way that I was cutting them.  So, I came up with this new way of cutting bell peppers to minimize the amount that I throw away.

1. Place your knife at the top of the pepper, about a half-inch from the top, and cut.


This is the best cut you can end up with: cutting off the top of the stem, but not the whole top of the pepper and also so that you can see part of the inside.


2. Next you want to cut off one 1/3 of the pepper, avoiding the white membrane.


 3. Cut through the membrane on one side of the pepper.


4. Place your knife in between the membrane and cut off another third of the pepper.


5. Continue cutting using the same cutting technique above. 


This is what you end up with!  The only parts that end up getting discarded are the parts that you don't want to eat: seeds, membrane, and the stem.


I have no idea if this is something that everyone else is already doing, but I thought I would share it anyway.  I hope this was helpful... let me know what you think! 

Happy Cooking!

Mrs. Modern